Necessary Preparations for Exchange Server Deployment | Complete Instructions for Installing Exchange Server 2019
To install the prerequisites for Microsoft Exchange Server 2019, carefully follow these steps. Ensure that the Exchange Server meets the Exchange Server System Requirements before proceeding. Note that Exchange 2019 Mailbox servers are supported on both Windows Server 2019 and Windows Server 2022.
Table of Contents:
1. Met prerequisites
2. Download required files.
a) Windows Server 2019 ISO
b) Exchange Server 2019 Cumulative Update 13
c) .NET Framework 4.8
d) Visual C++ Redistributable Package for Visual Studio 2012
e) Visual C++ Redistributable Package for Visual Studio 2013
f) Install Unified Communications Managed API 4.0
g) Install IIS URL Rewrite Module
3. Install following Software.
a) .NET Framework 4.8
b) Visual C++ Redistributable Package for Visual Studio 2012
c) Visual C++ Redistributable Package for Visual Studio 2013
d) Install Unified Communications Managed API 4.0
e) Install IIS URL Rewrite Module
4. Install the required Windows components
5. Prepare the Schema and the Active Directory
6. Install Exchange 2019 Server
- Exchange Server System Requirements
- Update Windows Server: Ensure your Windows Server is up-to-date with the latest service packs and updates.
- Join the Server to the Domain: Make sure the server is joined to the Active Directory domain.
- Download ISO files: Windows Server 2019 Standard or Datacenter
- Exchange Server 2019 Cumulative Update 13
- .NET Framework 4.8 (After the installation, reboot the system.)
- Visual C++ Redistributable Package for Visual Studio 2012
- Visual C++ Redistributable Package for Visual Studio 2013
- Install Unified Communications Managed API 4.0
- Install IIS URL Rewrite Module
- .NET Framework 4.8
- Visual C++ Redistributable Package for Visual Studio 2012
- Visual C++ Redistributable Package for Visual Studio 2013
- Install Unified Communications Managed API 4.0
- Install IIS URL Rewrite Module
Run PowerShell as administrator. Run the following command to install the required Windows components.
- Install Server Media Foundation (Lync Server or Skype for Business Server).
Install-WindowsFeature Server-Media-Foundation
- Install RSAT feature.
Install-WindowsFeature RSAT-ADDS
- Install the Remote Server Administration Toolkit and other required components.
Install-WindowsFeature NET-Framework-45-Features, RSAT-ADDS, RPC-over-HTTP-proxy, RSAT-Clustering, RSAT-Clustering-CmdInterface, RSAT-Clustering-Mgmt, RSAT-Clustering-PowerShell, Web-Mgmt-Console, WAS-Process-Model, Web-Asp-Net45, Web-Basic-Auth, Web-Client-Auth, Web-Digest-Auth, Web-Dir-Browsing, Web-Dyn-Compression, Web-Http-Errors, Web-Http-Logging, Web-Http-Redirect, Web-Http-Tracing, Web-ISAPI-Ext, Web-ISAPI-Filter, Web-Lgcy-Mgmt-Console, Web-Metabase, Web-Mgmt-Console, Web-Mgmt-Service, Web-Net-Ext45, Web-Request-Monitor, Web-Server, Web-Stat-Compression, Web-Static-Content, Web-Windows-Auth, Web-WMI, Windows-Identity-Foundation
1. Prepare Schema: Open a command prompt and navigate to the directory where you extracted the Exchange Server installation files. Run the following command:
Setup.exe /PrepareSchema /IAcceptExchangeServerLicenseTerms_DiagnosticDataOn
Setup.exe /PrepareAD /OrganizationName:”Organization” /IAcceptExchangeServerLicenseTerms_DiagnosticDataOn
[Replace “Organization” with your desired Exchange organization name.]
2. Reboot the computer system.
First, download the latest Cumulative Update (CU) for Exchange Server 2019. After the download, right-click the ISO file and select ‘Mount’. Then, open Command Prompt and navigate to the mounted ISO location by using the cd command to reach the directory containing the Exchange Setup.exe file.
1. Start the installation by running the exe file.
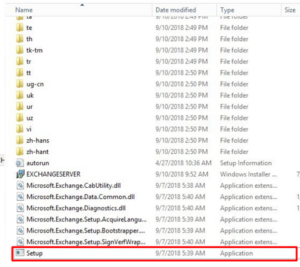
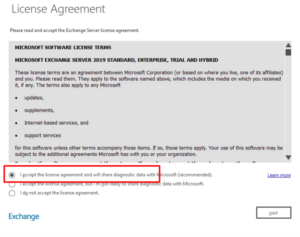
2. Click next. Accept the license agreement and click next.
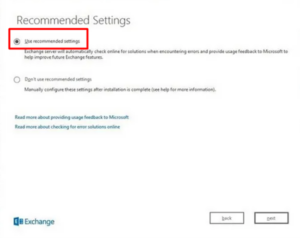
3. Choose Recommended settings and click
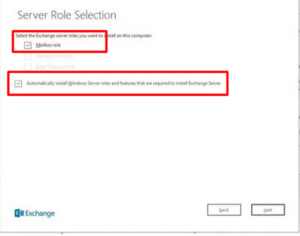
4. Choose Mailbox Roleand check Automatically install Windows Server roles and features required to install Exchange Server. Then click next.
5. Select the location where you want to install the Exchange Server and click Next. Prefer location is System drive C.
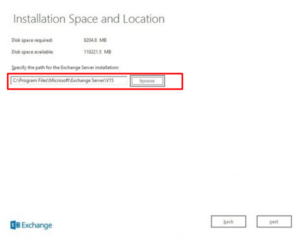
6. Enter your organization’s name and click next.
7. Under Malware Protection Settings, select No and click Next.
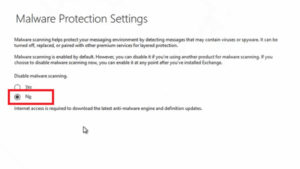
8. Under Readiness Checks Exchange server will check all the prerequisites are met. If it shows prerequisite analysis 100% then, Click Install.
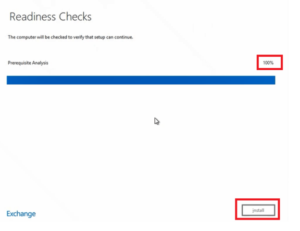
9. On the next page, you will see Setup Progress.
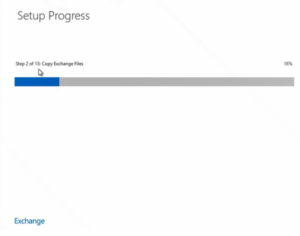
10.Once Exchange 2019 is installed successfully, you will see Setup Completedpage as shown below. Click Finish.
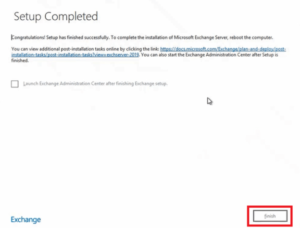
Finally, you have successfully installed Exchange Server 2019.